 Getting Started
Getting Started
Getting Started1. Install RaySim6 by copying the RaySim folder from the CD provided (or by unzipping the file RaySim6.zip if you downloaded the program from the world wide web) into a convenient location on your hard drive. At present, RaySim6 keeps all input and output data files in the same directory folder, so put the program files in a hard disk location where you can read from and write to the disk. The installation files are typically less than 1 MB and saved Models and exported data are typically small.
The RaySim6 installation does not edit your windows registry or install any .dll or associated files.
2. Run RaySim6 in the usual
way of running executable files on MS Windows. If from the Start Menu, choose
Run and then Browse. Navigate to your RaySim6 directory folder using the Browse
dialog box. Select ![]() RaySim6.exe.
RaySim6.exe.
3. RaySim6 starts with a new Document and one empty Batch. You can add names to your Batches, see Building Batches.
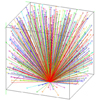
4. Open the demo Document called "Starter". Click File on the Menu Bar and Select Open. Select Raytrace/Start from the Menu Bar. You should see the following view (minus the extra labels).

Congratulations, you've just made your first ray trace using RaySim6. The Model you traced is called Box, it is a cube of non-absorbing air, with five absorbing surfaces and a diffuse reflecting surface (on the bottom). The colors of the rays correspond to their wavelength, as indicated by the Trace Legend bar.